If you haven't already, download and install GoodSync.
With GoodSync, you can back up and sync to and from a wide range of Amazon S3-compatible object storage, including IDrive e2, Tencent Cloud Object Storage, Cloudflare R2, UpCloud Object Storage, and more.
Wasabi users: Wasabi now has a dedicated Wasabi S3 connection option in GoodSync and no longer needs to be configured through Amazon S3. For setup instructions, see Wasabi Cloud Storage.
NOTE: For instructions on setting up a job with Amazon S3 object storage, refer to the corresponding article.
- Setting up a GoodSync job for syncing or backing up with S3-compatible storage
- Using Wasabi Cloud Storage with GoodSync
- How to obtain IDrive e2 access keys
- How to obtain Tencent Cloud Object Storage (COS) access keys
- How to obtain Cloudflare R2 access keys
- How to obtain UpCloud Object Storage access keys
Setting up a GoodSync job for syncing or backing up with S3-compatible storage
Follow the steps outlined below to configure your GoodSync job:
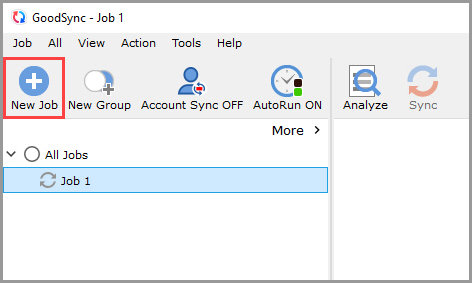
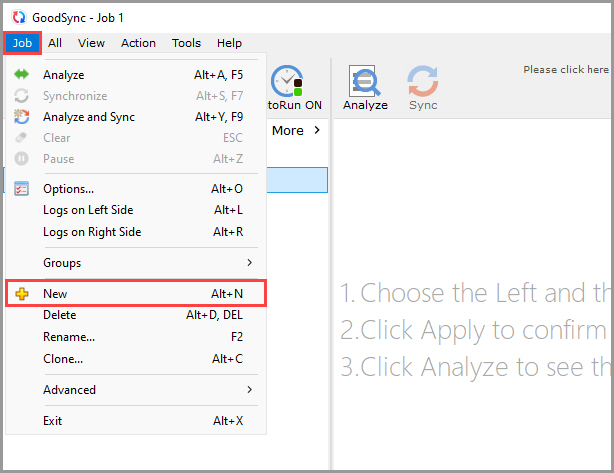
1) Open GoodSync and click the "New Job" button in the toolbar, or, in the "Job" menu, select "New."
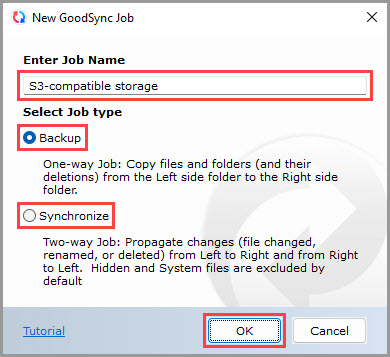
2) In the New GoodSync Job prompt, enter the name of your new Job. Then, select "Backup" or "Synchronize" as your Job type.
Click the "OK" button when done.
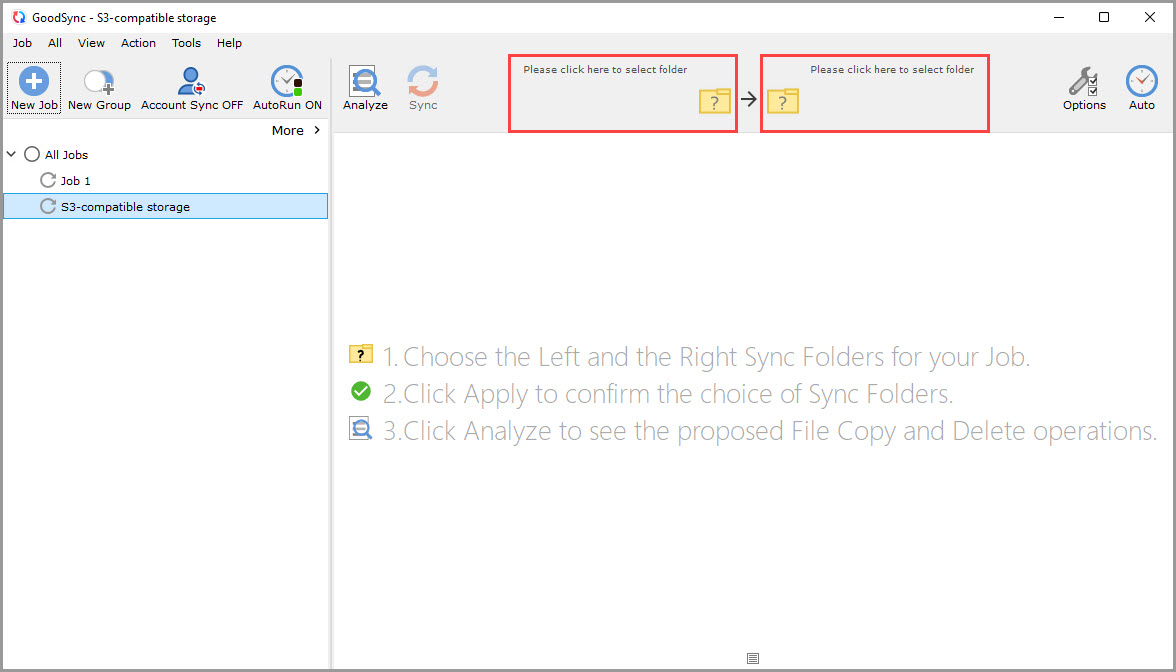
3) Click the Left or Right sync folder controls to view the files and folders available for selection.
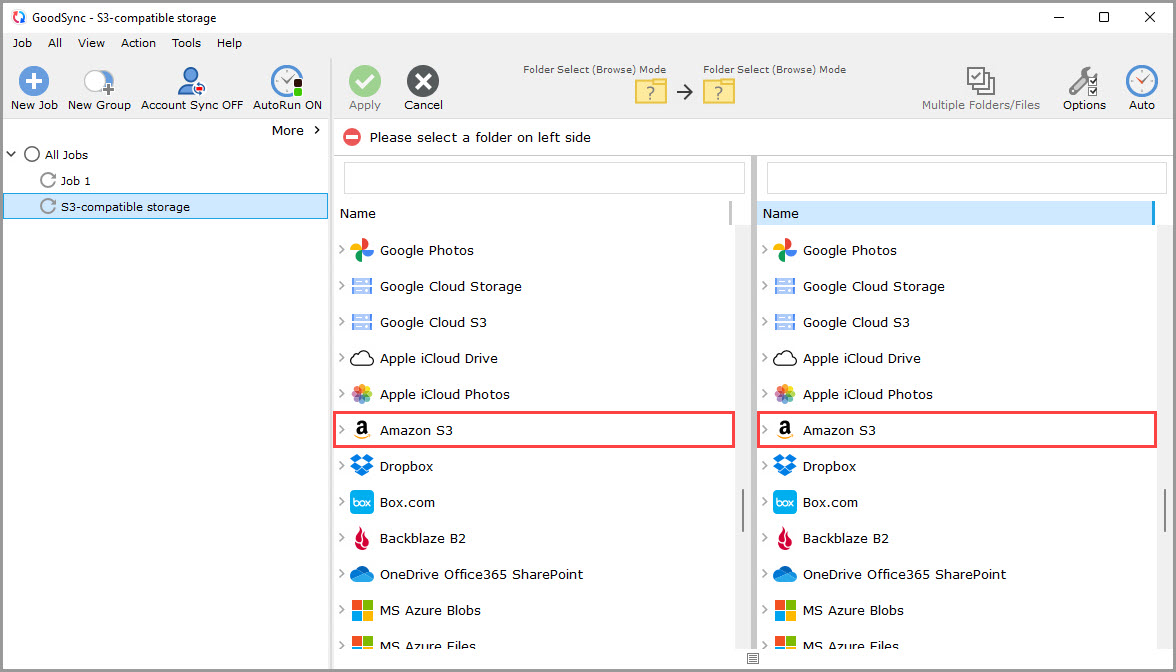
4) Scroll down, and select "Amazon S3" from the list of supported services on either side.
NOTE: If you are connecting to Wasabi, do not select Amazon S3. Select Wasabi S3 directly and follow the Wasabi Cloud Storage guide.
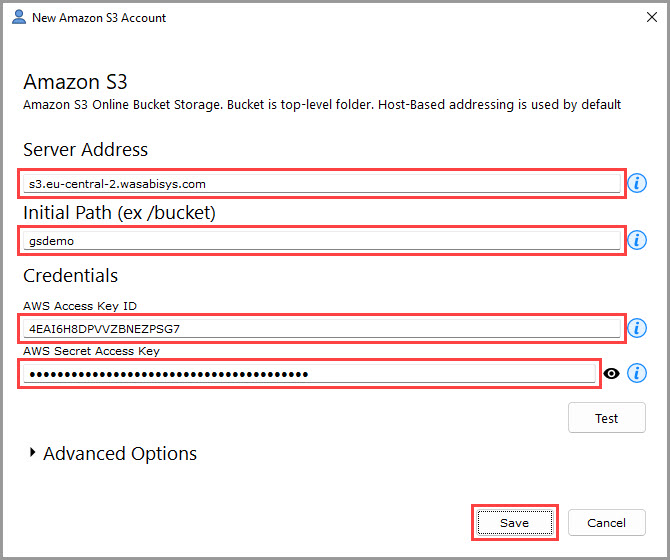
5) A window will appear prompting you to authorize GoodSync to access your Amazon S3-compatible storage account. Enter the required information in the appropriate fields:
- In the "Server Address" field, enter the endpoint for your S3-compatible storage, usually available in your storage provider's console.
- In the "Initial Path" field, optionally enter the bucket name.
NOTE: When creating a bucket, it's recommended to avoid using custom features like encryption, object versioning, or object lock.
- In the "AWS Access Key ID" field under "Credentials," enter the access key as it appears in your S3-compatible storage account.
- In the "AWS Secret Access Key" field under "Credentials," enter the secret access key as it appears in your S3-compatible storage account.
NOTE: For instructions on generating access keys for supported S3-compatible storage services, refer to the provider-specific sections below.
Then, click the "Save" button.
6) After permission is given to GoodSync, your S3-compatible storage account content will be displayed within the GoodSync interface.
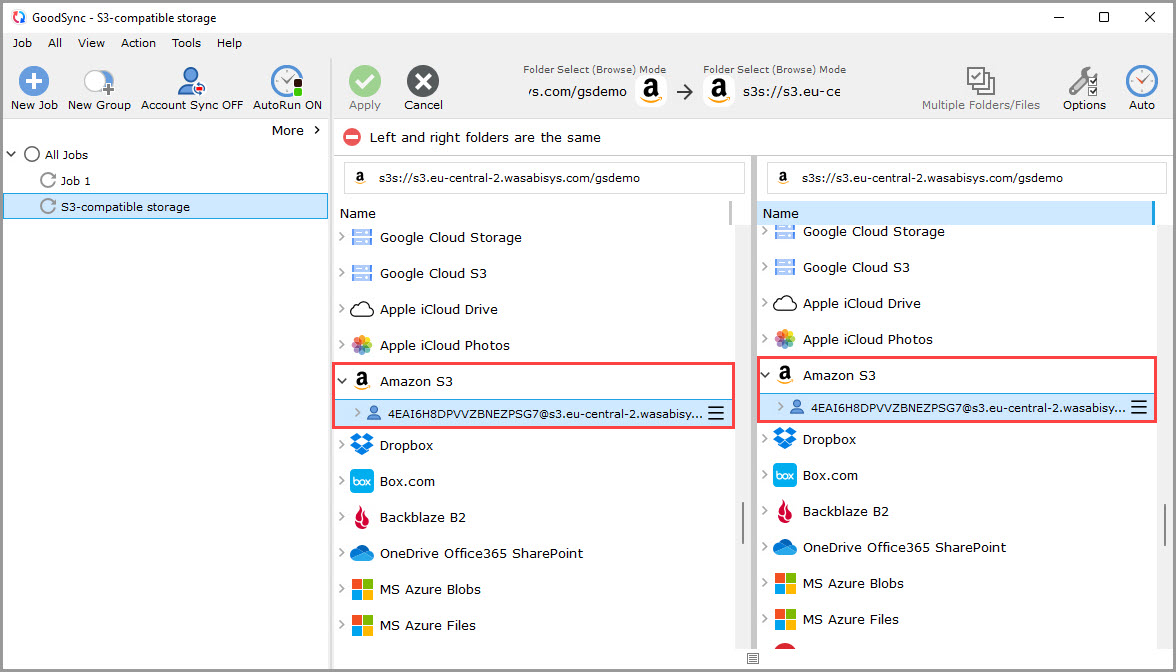
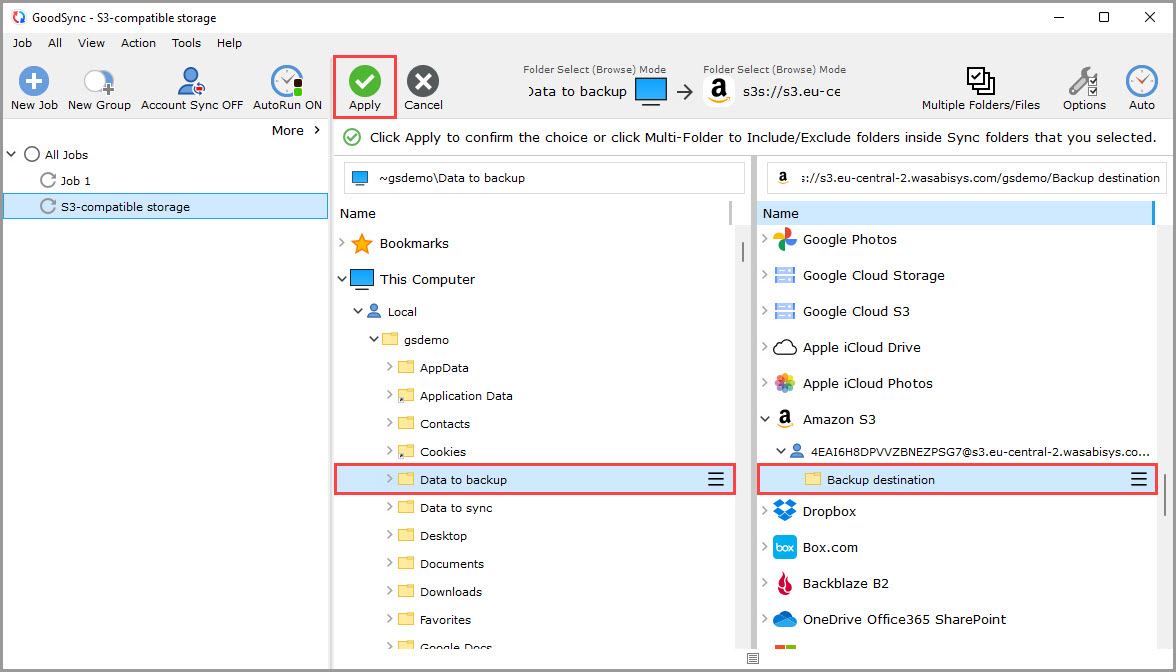
7) Select a folder that contains the data you wish to back up or sync on the left side.
On the right side, click "Amazon S3" and select or create a folder on your S3-compatible storage that you wish to back up or sync to.
Then, click the green "Apply" button.
8) Your Job is now ready to Analyze and Sync.
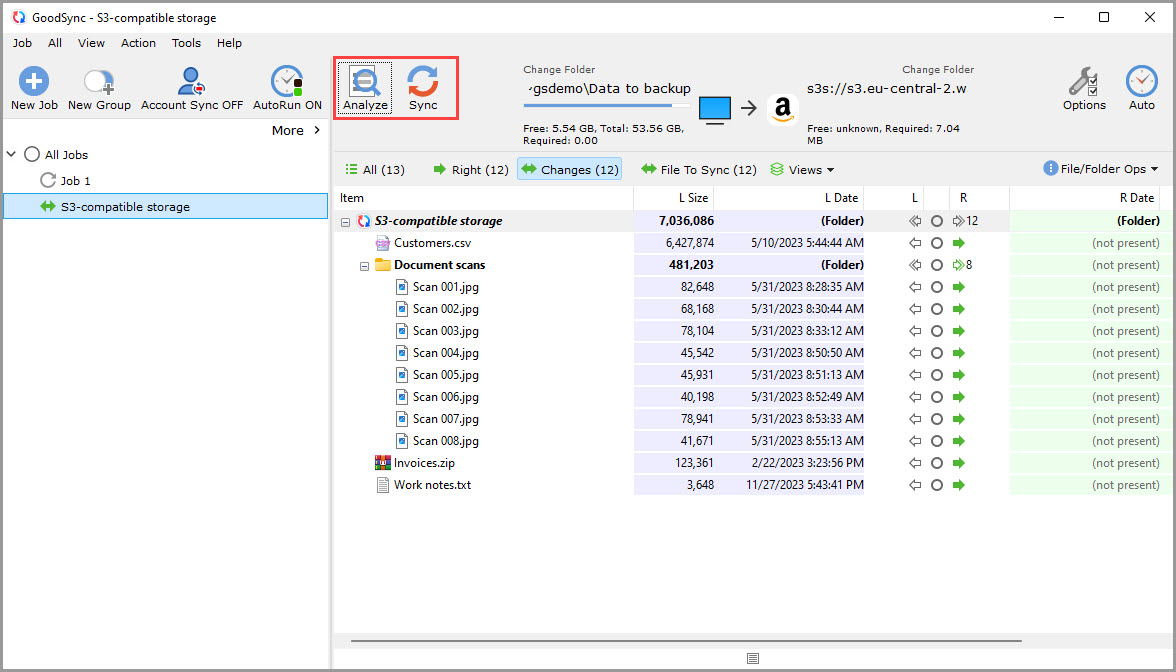
NOTE: To configure the job with automation or other settings, click here.
How to obtain IDrive e2 access keys
1) Log in to your IDrive e2 console.
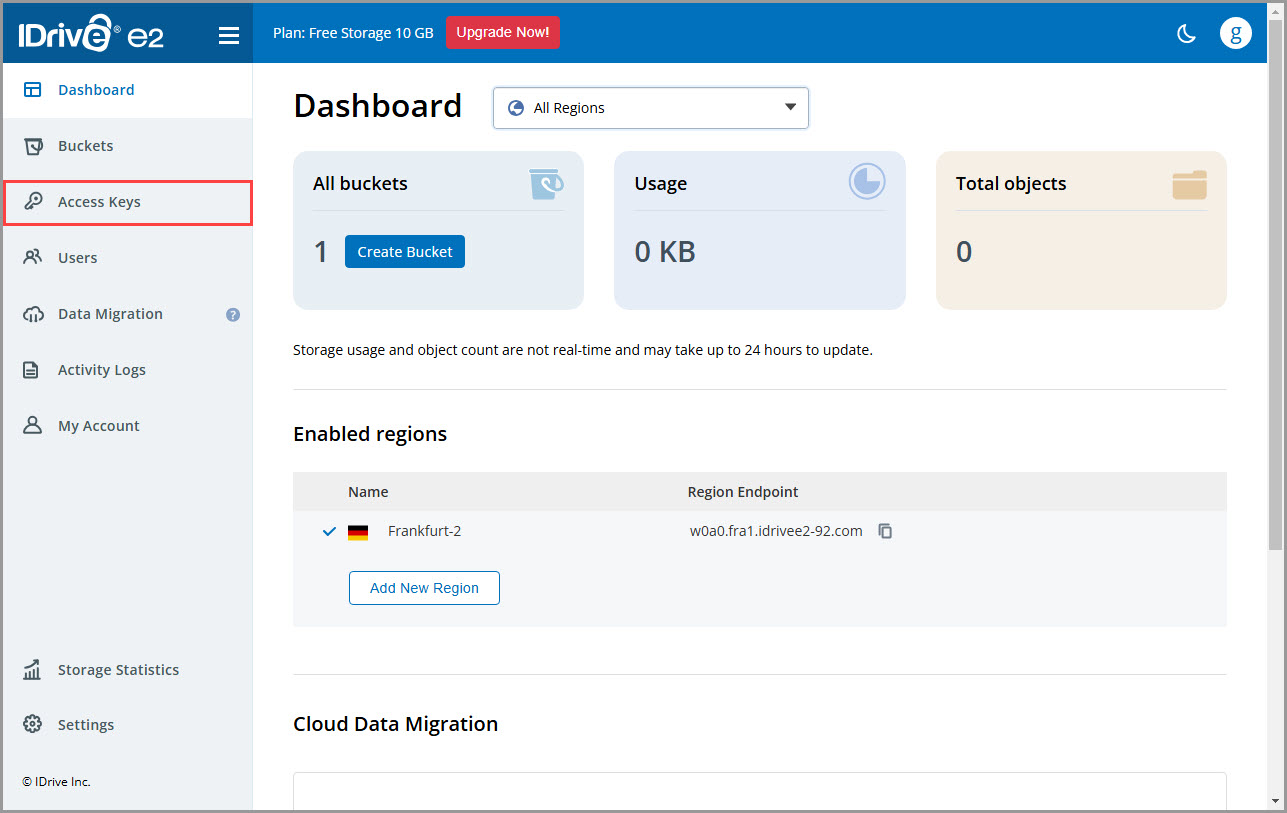
2) From the left-side menu, click "Access Keys."
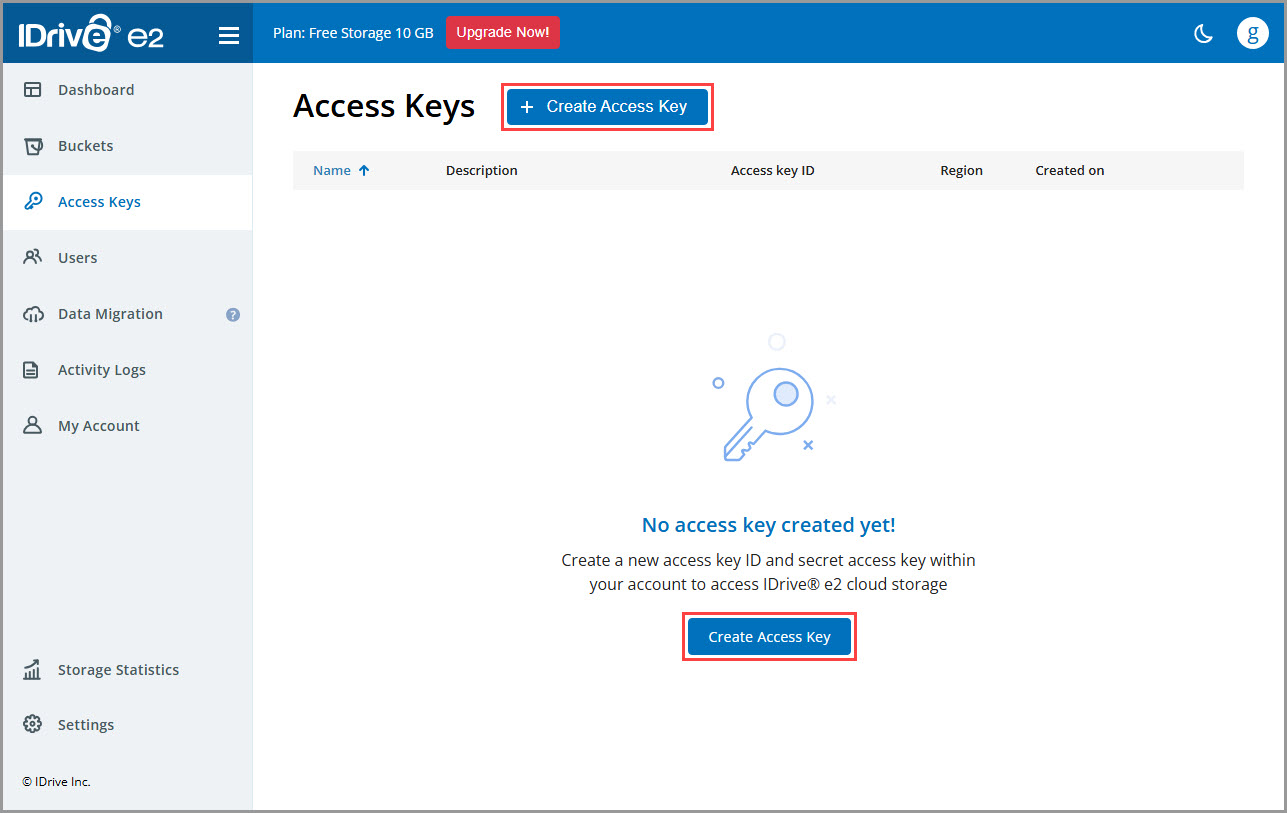
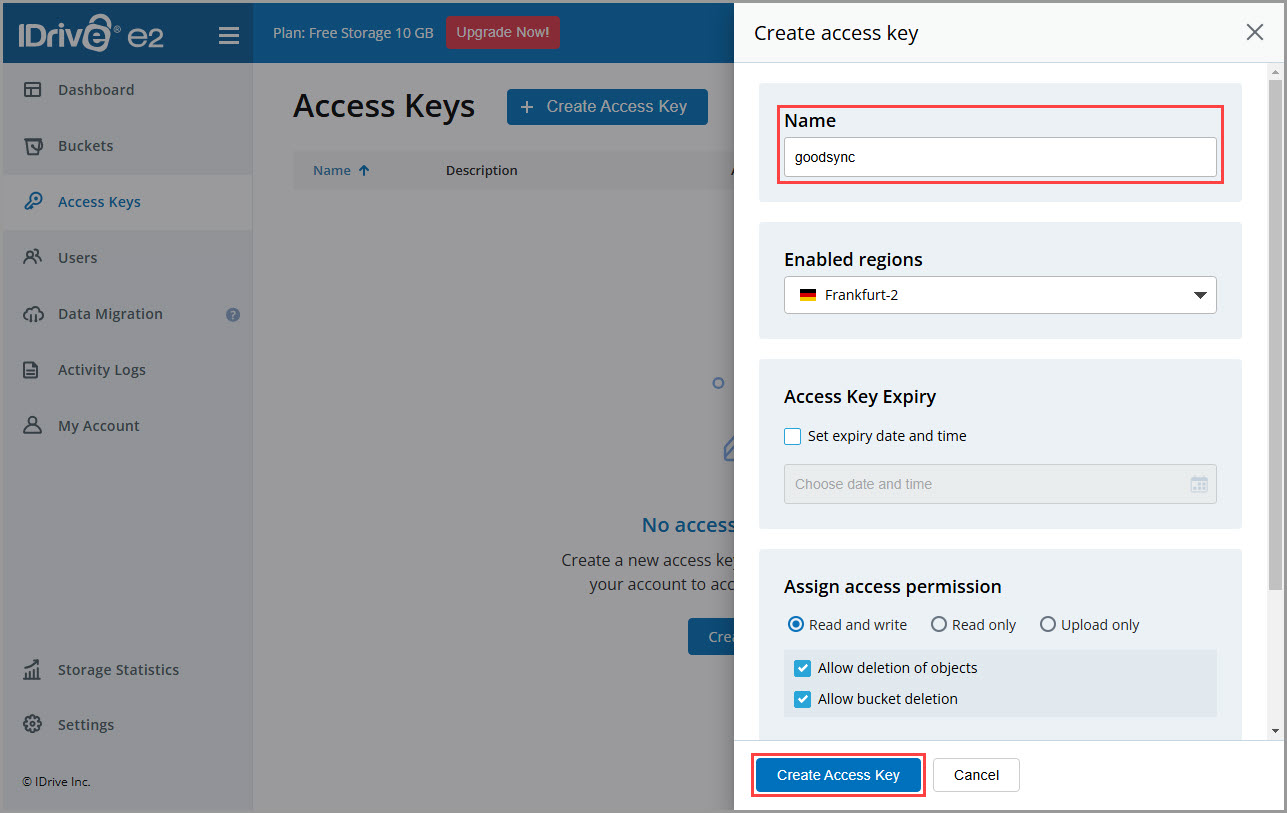
3) Click the "Create Access Key" button located either at the top or in the middle of the page.
4) Enter a recognizable name for the access key, adjust other settings as needed, and click the "Create Access Key" button at the bottom.
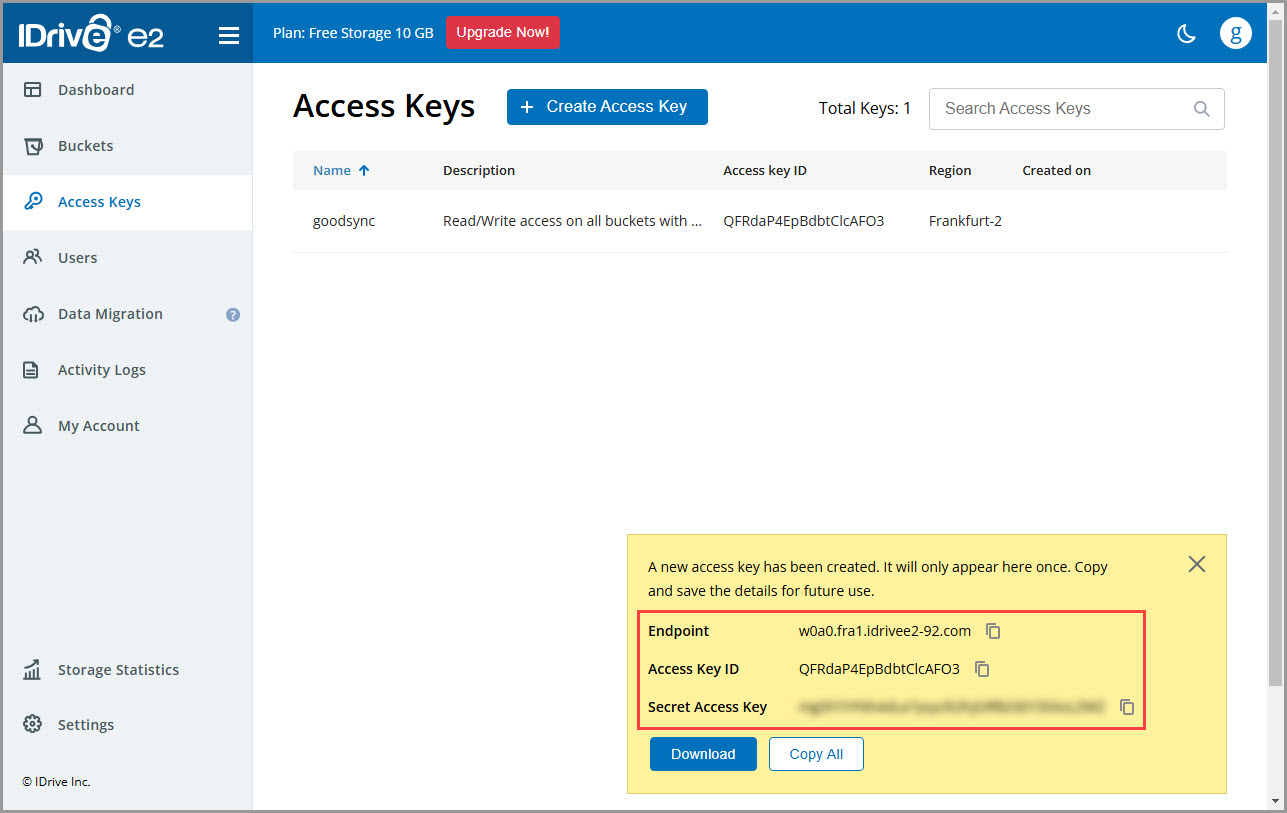
5) You will see your new access key pair ("Access Key ID" and "Secret Access Key") as well as the service endpoint for use in GoodSync listed.
NOTE: We recommend storing the access key pair in a safe place like RoboForm SafeNote.
How to obtain Tencent Cloud Object Storage (COS) access keys
1) Log in to your Tencent Cloud console.
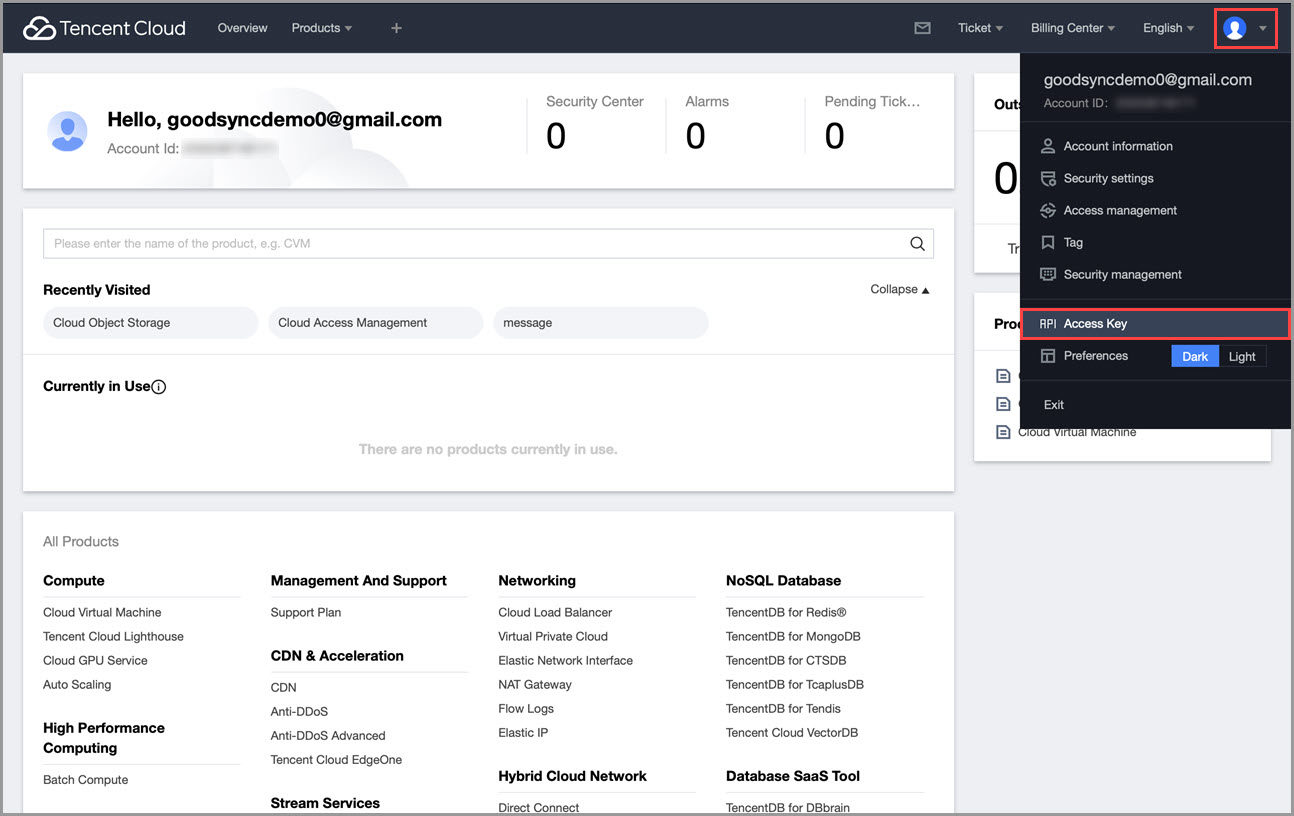
2) In the upper-right corner, click the user icon, then select "Access Key."
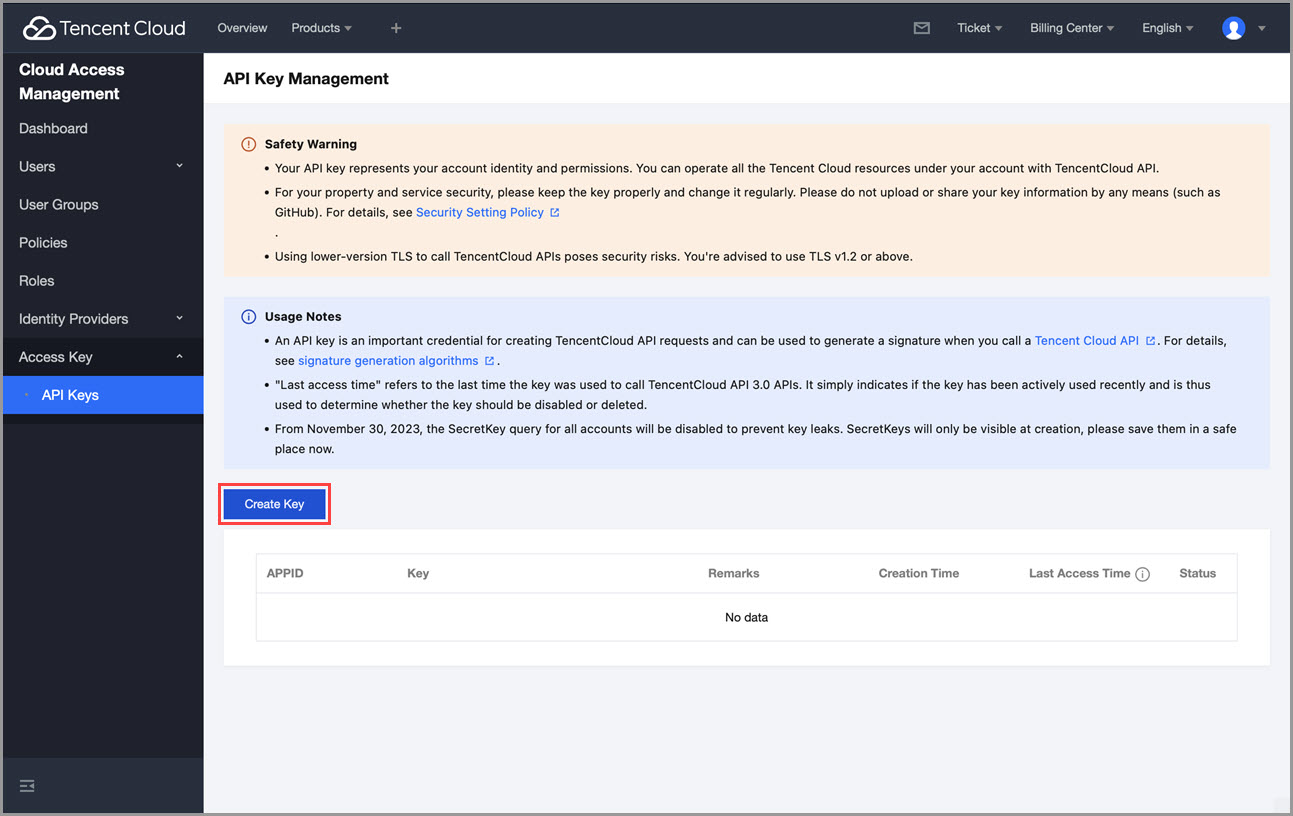
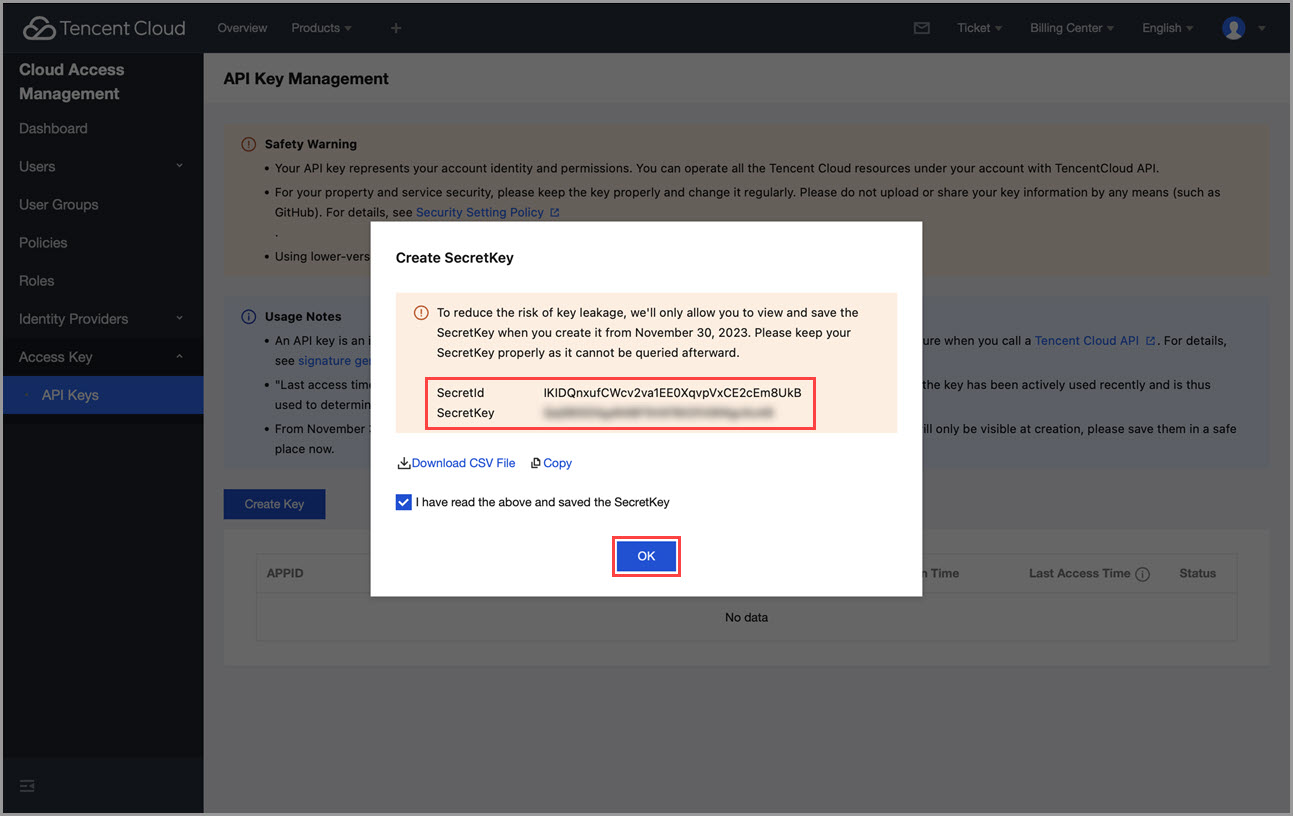
3) Click the "Create Key" button.
4) You will see your new access key. The "SecretId" and "SecretKey" for use in GoodSync will be listed. Click "OK" to finish.
NOTE: We recommend storing the access key pair in a safe place like RoboForm SafeNote.
How to obtain Cloudflare R2 access keys
1) Log in to your Cloudflare console.
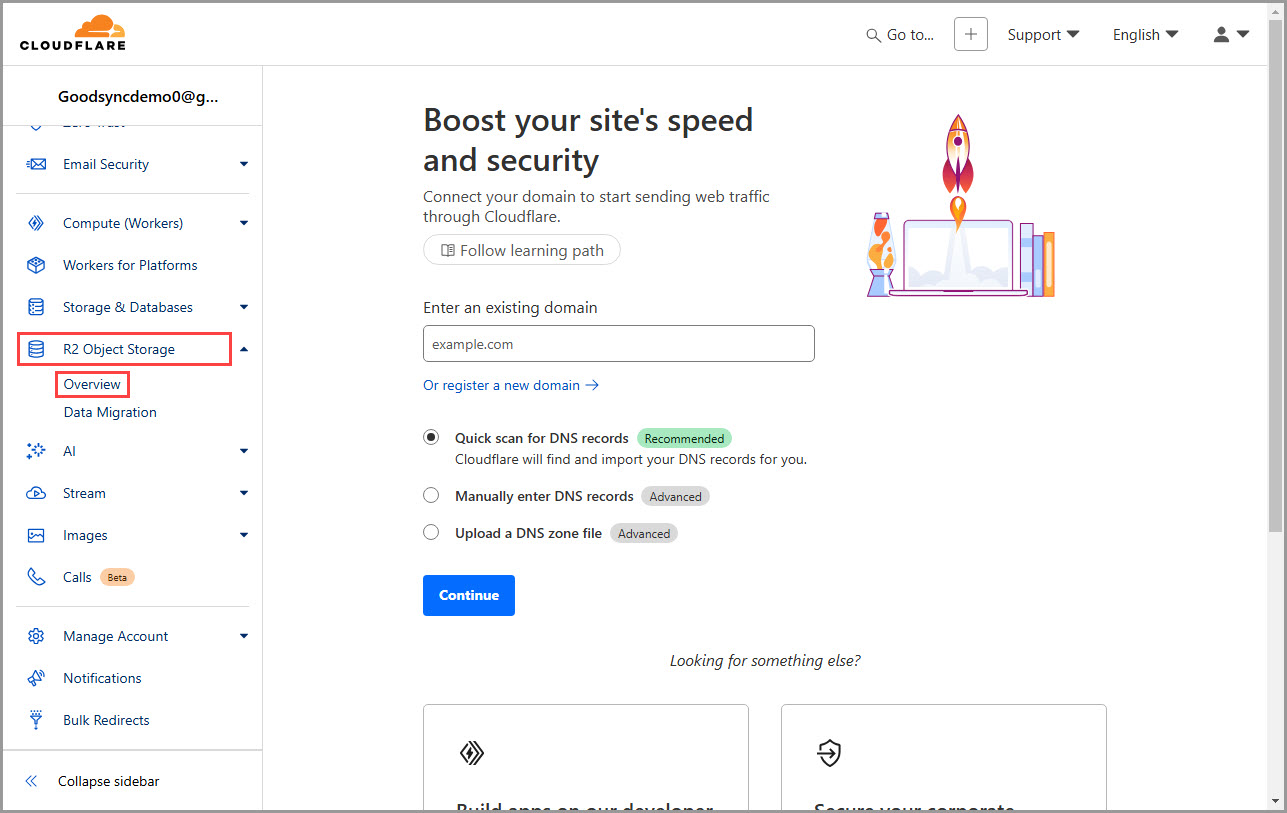
2) From the left-side menu, click "R2 Object Storage," then click "Overview."
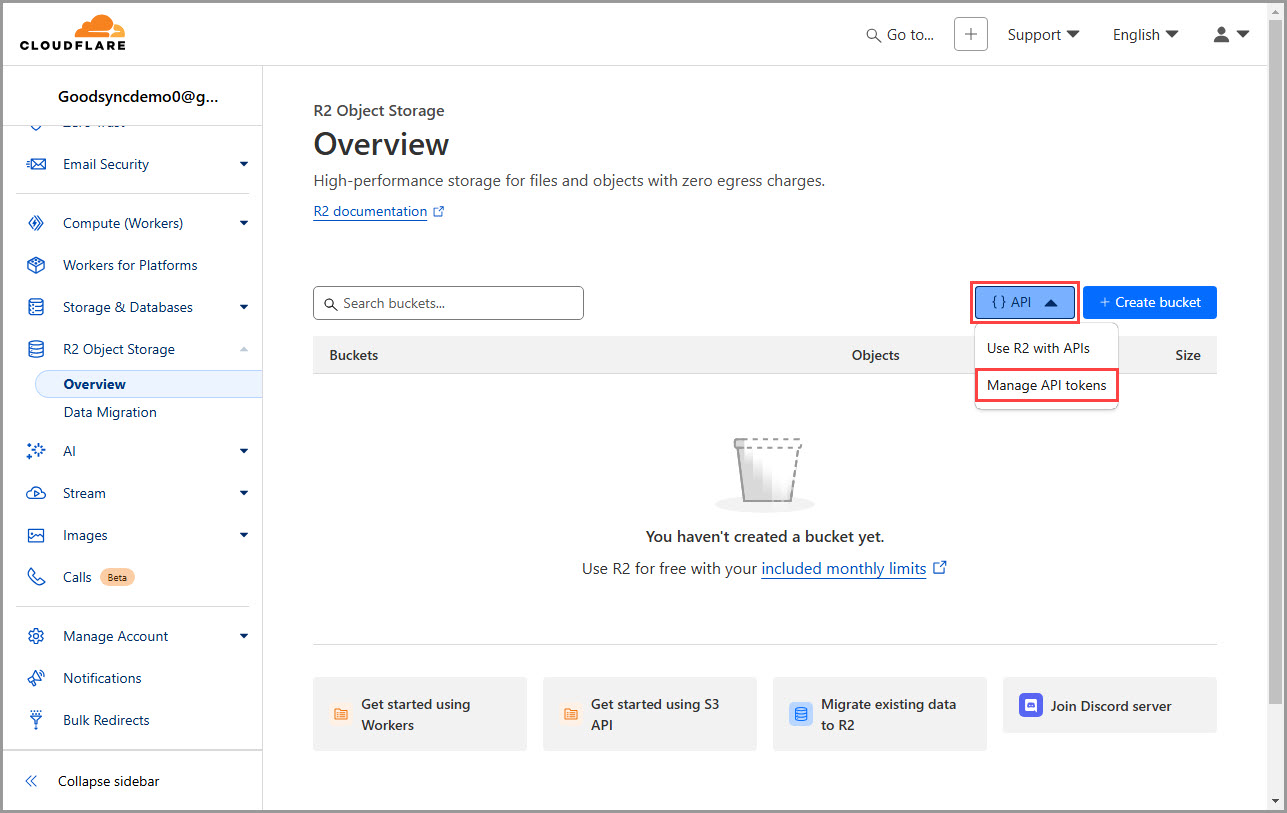
3) Click the "{ } API" button, and from the dropdown menu select "Manage API tokens."
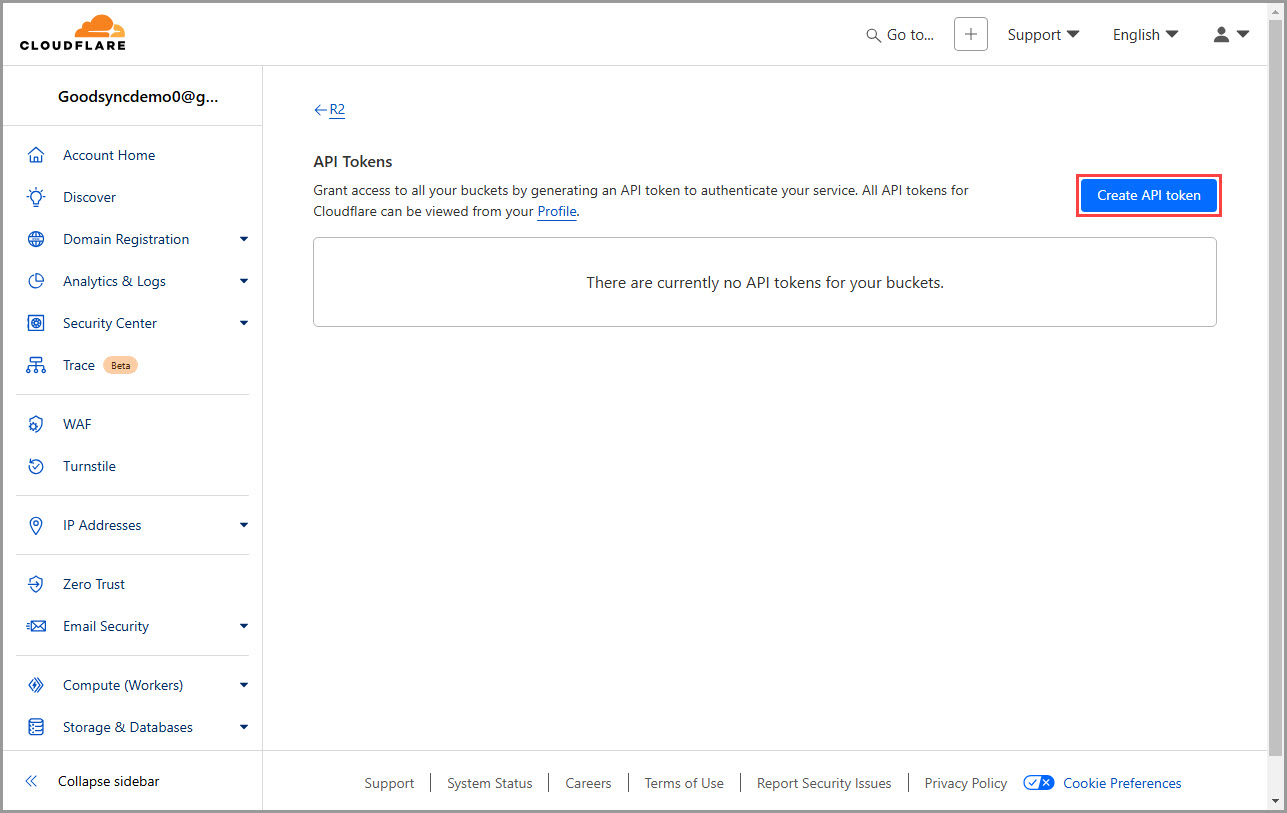
4) Click the "Create API token" button.
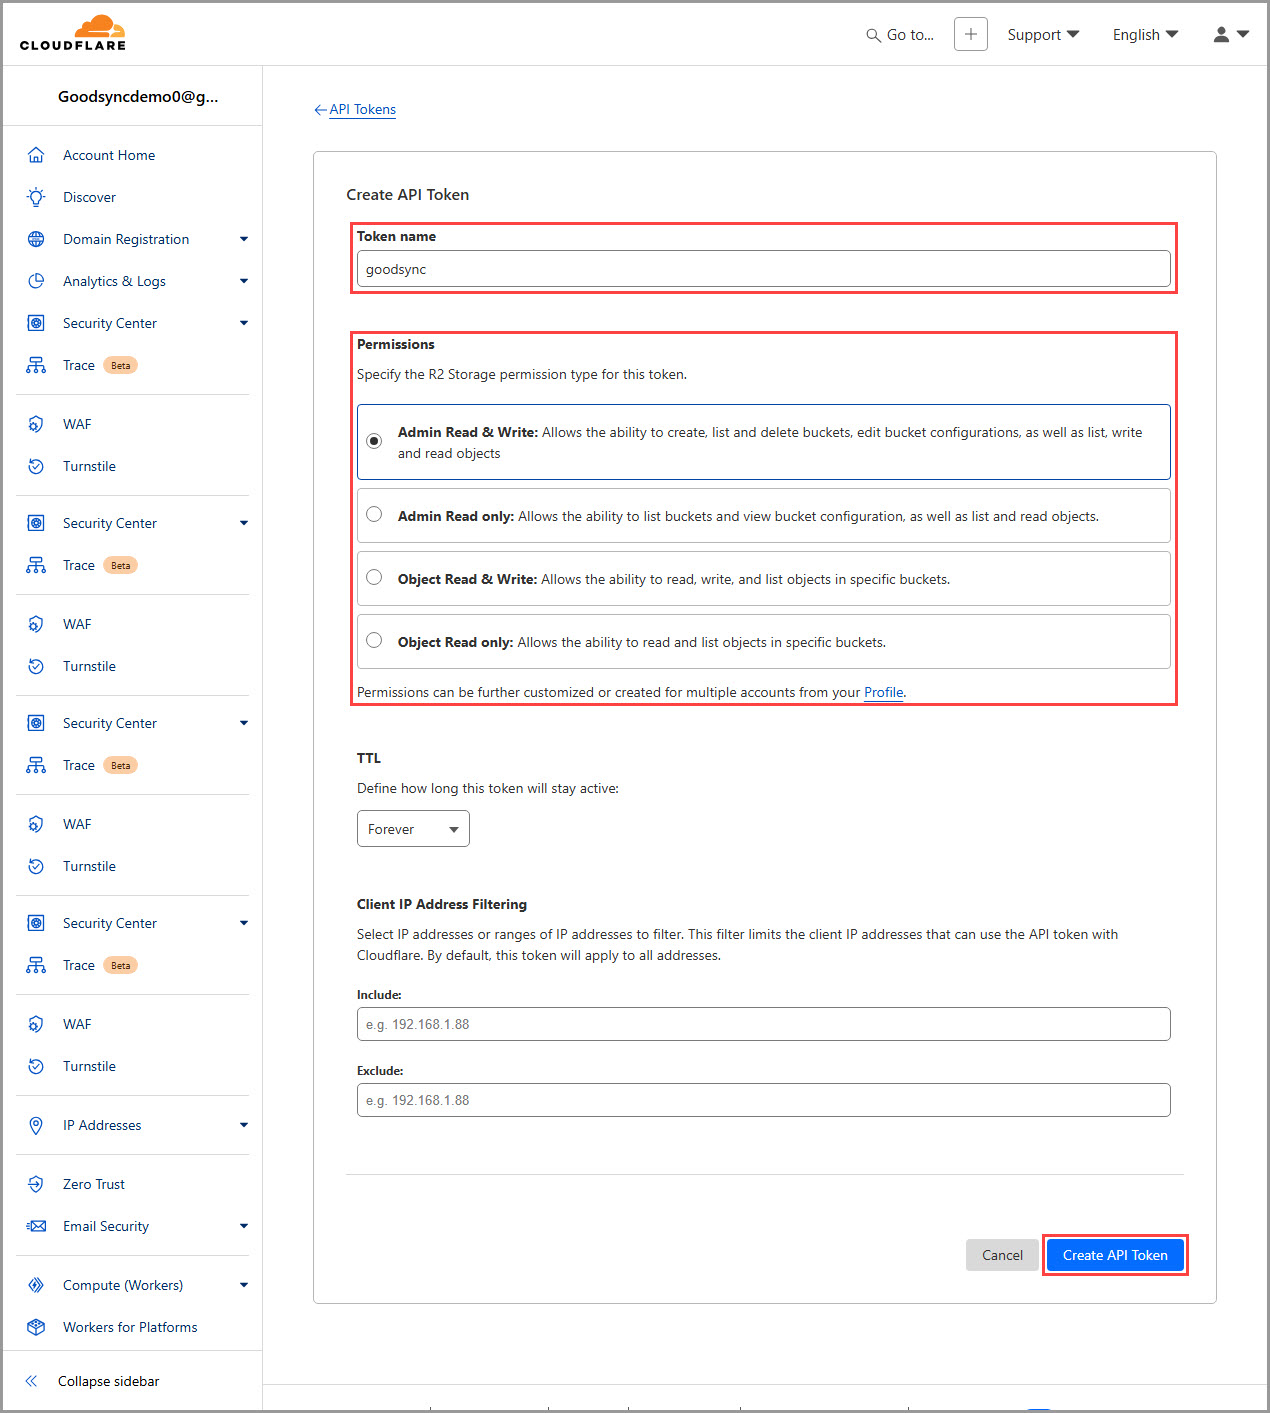
5) Specify the Token name, select the permission type, and click "Create API Token."
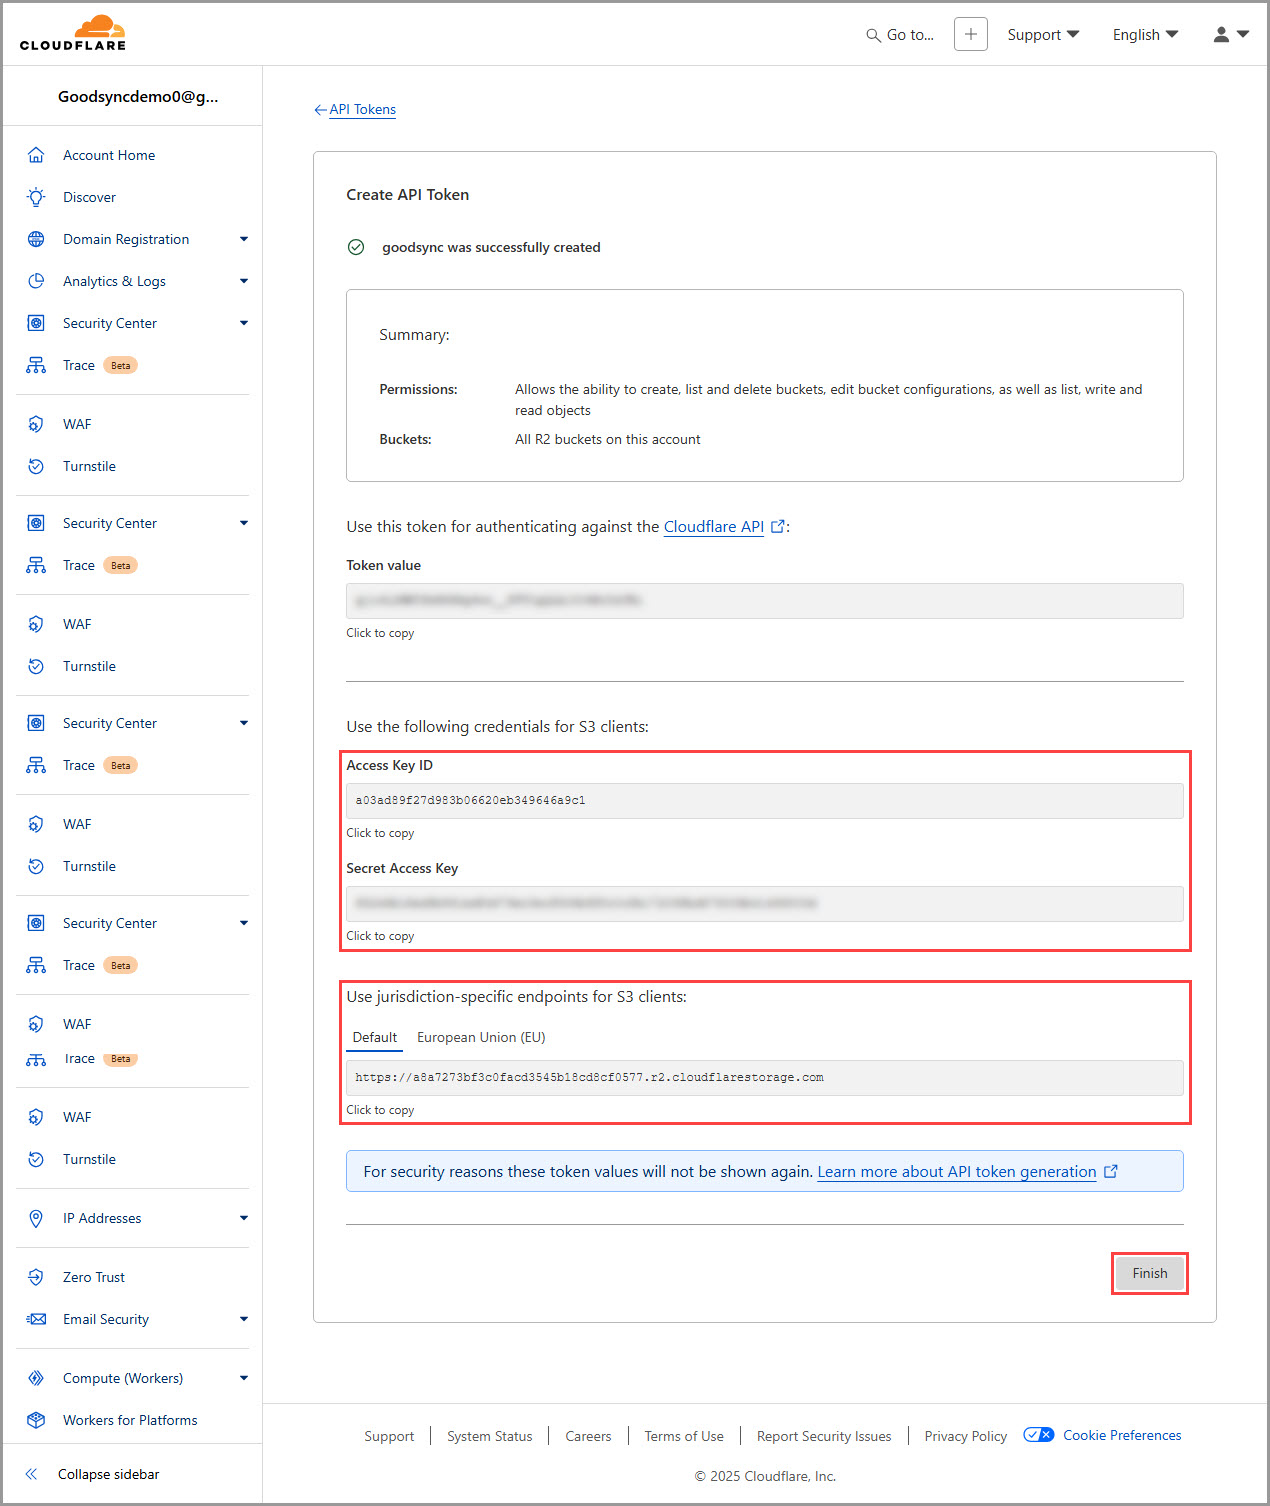
6) You will see your new access key pair ("Access Key ID" and "Secret Access Key") as well as the service endpoint for use in GoodSync listed. Click "Finish" to return back.
NOTE: We recommend storing the access key pair in a safe place like RoboForm SafeNote.
How to obtain UpCloud Object Storage access keys
1) Log in to your UpCloud console.
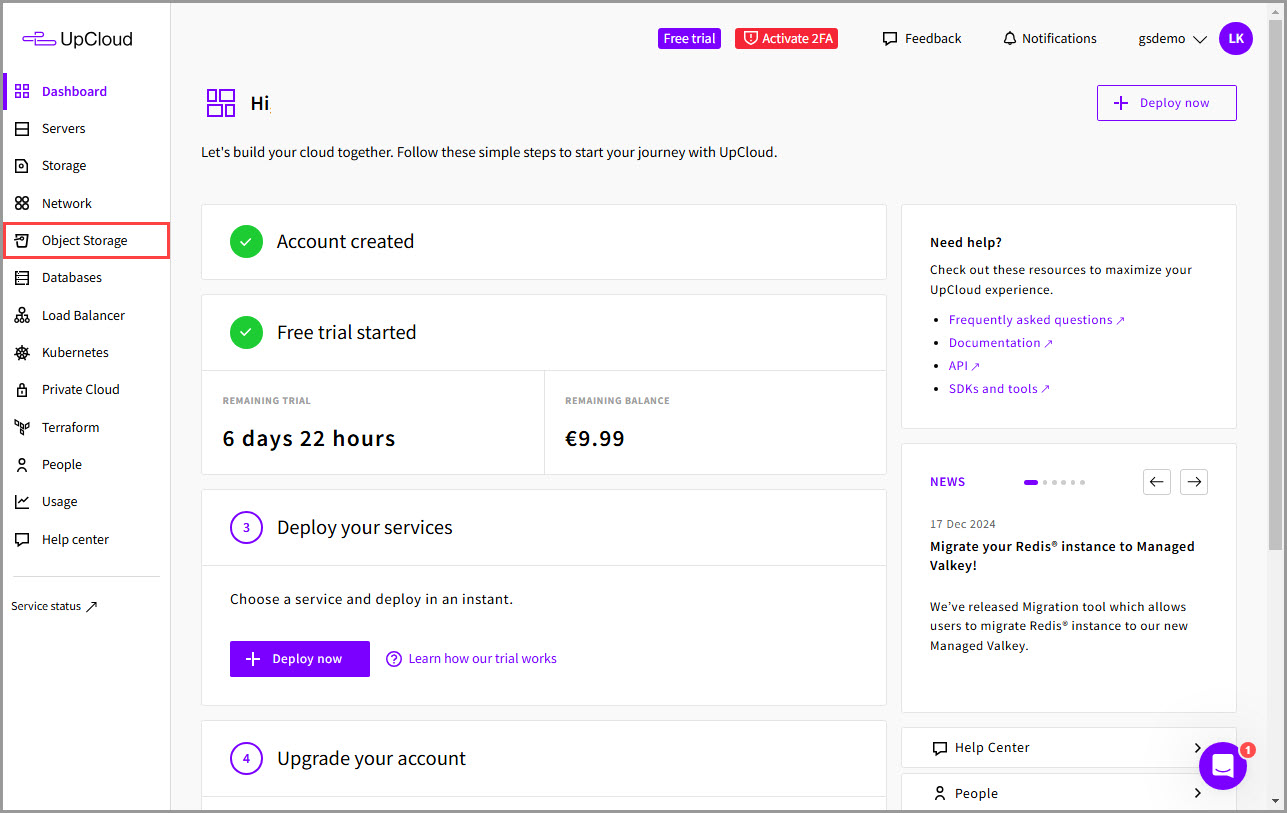
2) From the left-side menu, click "Object Storage."
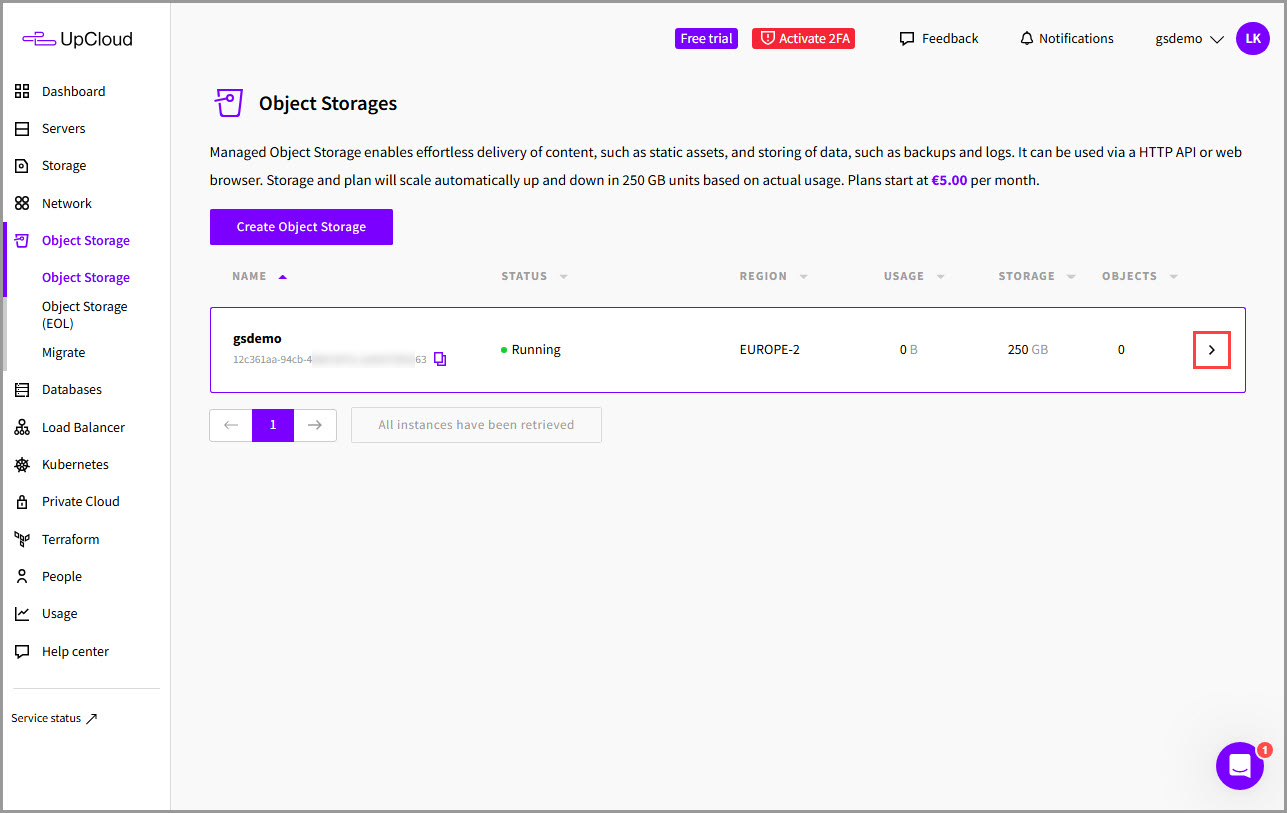
3) Click the arrow to the right of your Object Storage details.
4) Switch to the "Users" tab on the top navigation.
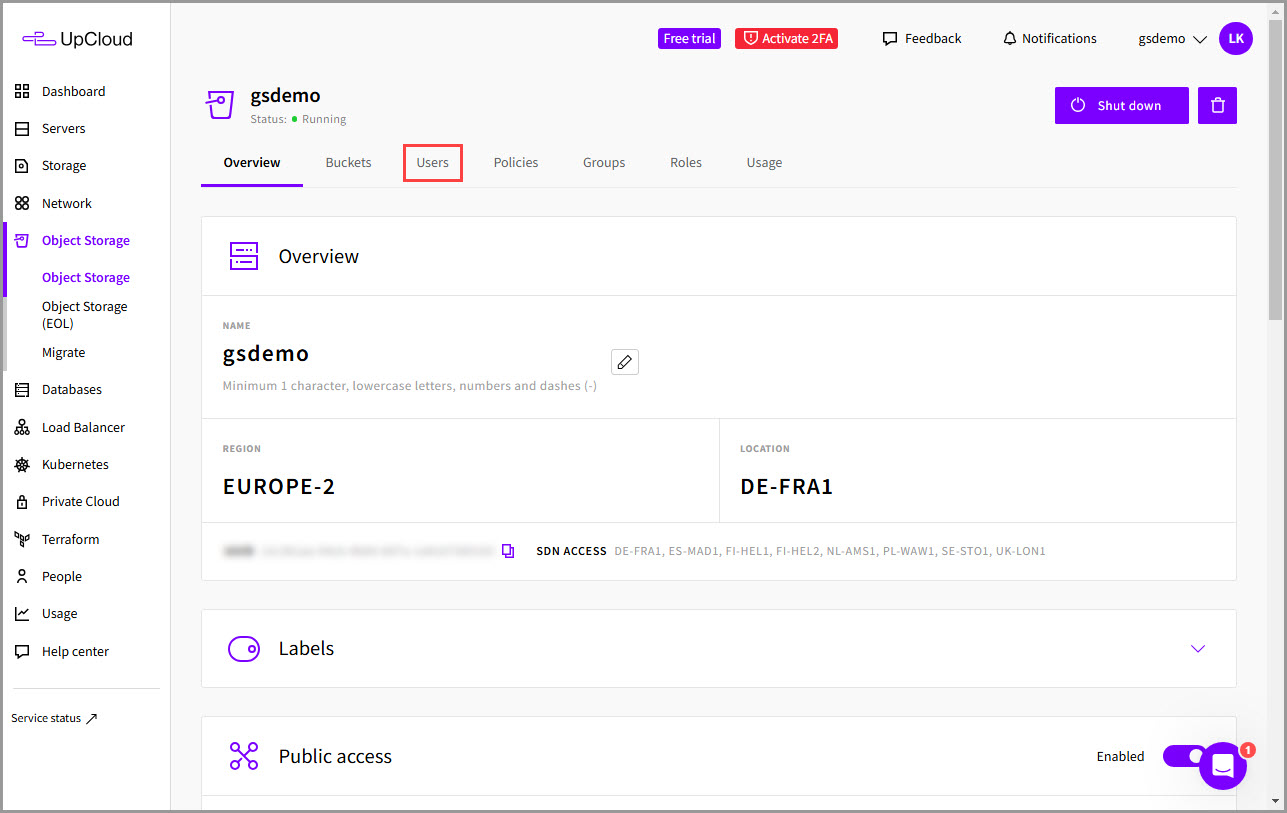
5) Click the "Add user" button.
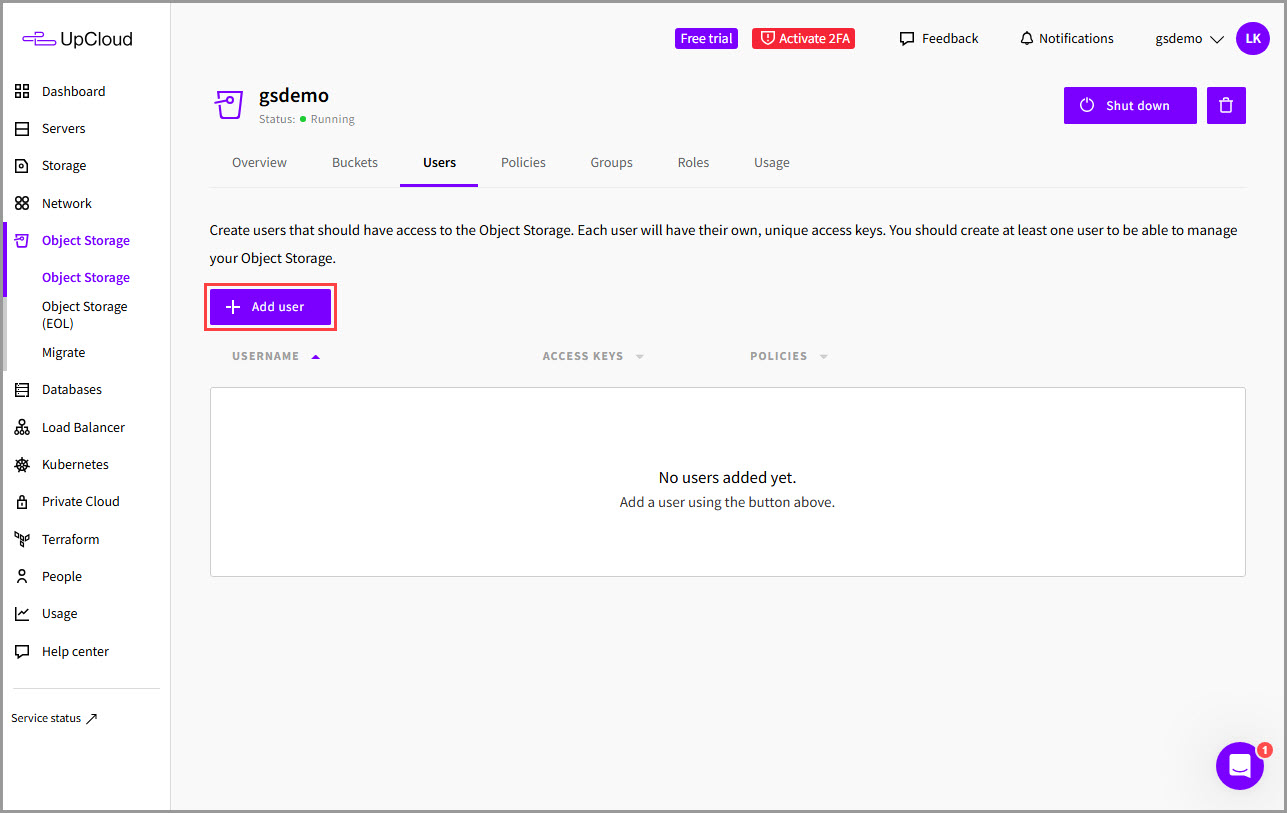
6) Specify the Username and click "Add."
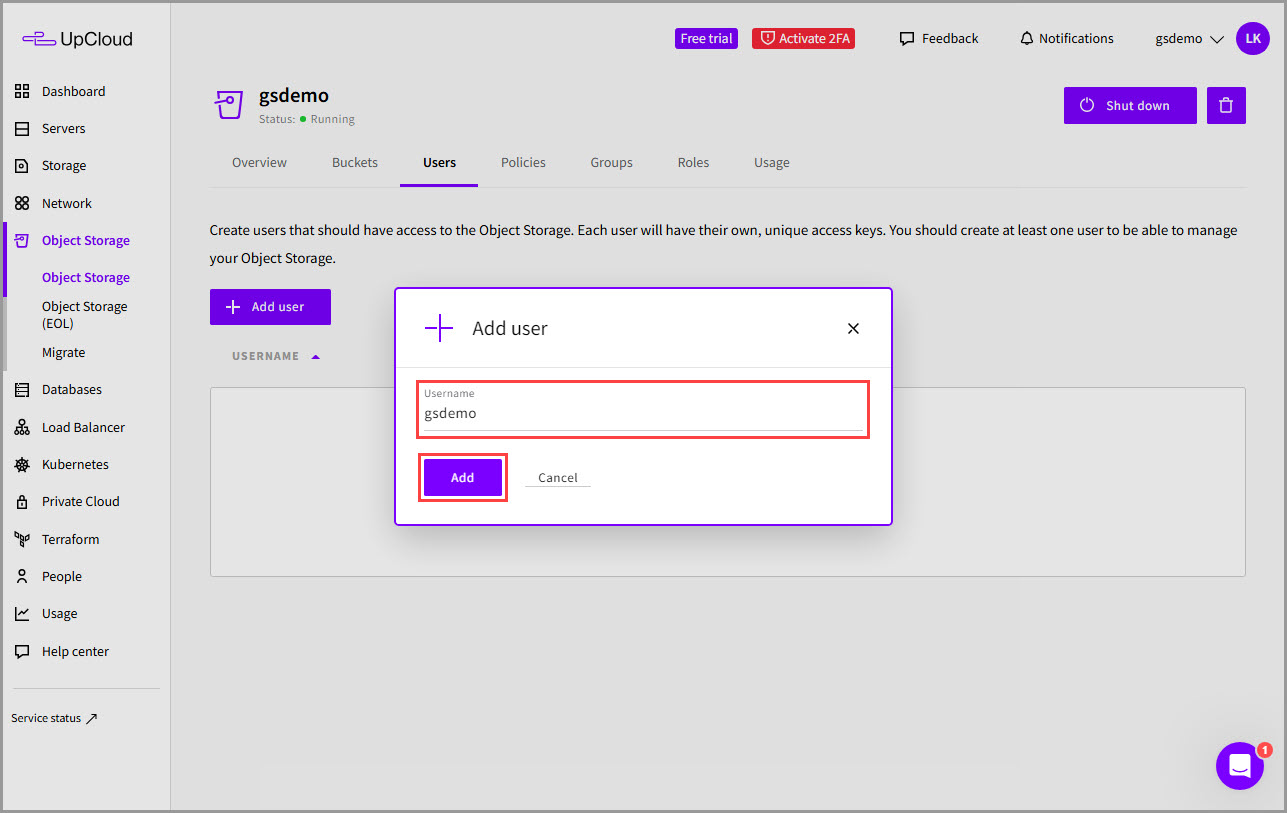
7) On the right of the new user's details, click the "+ ACCESS KEY" button.
NOTE: Remember to assign the appropriate policies to your user to grant permissions for reading and writing objects in the Object Storage.
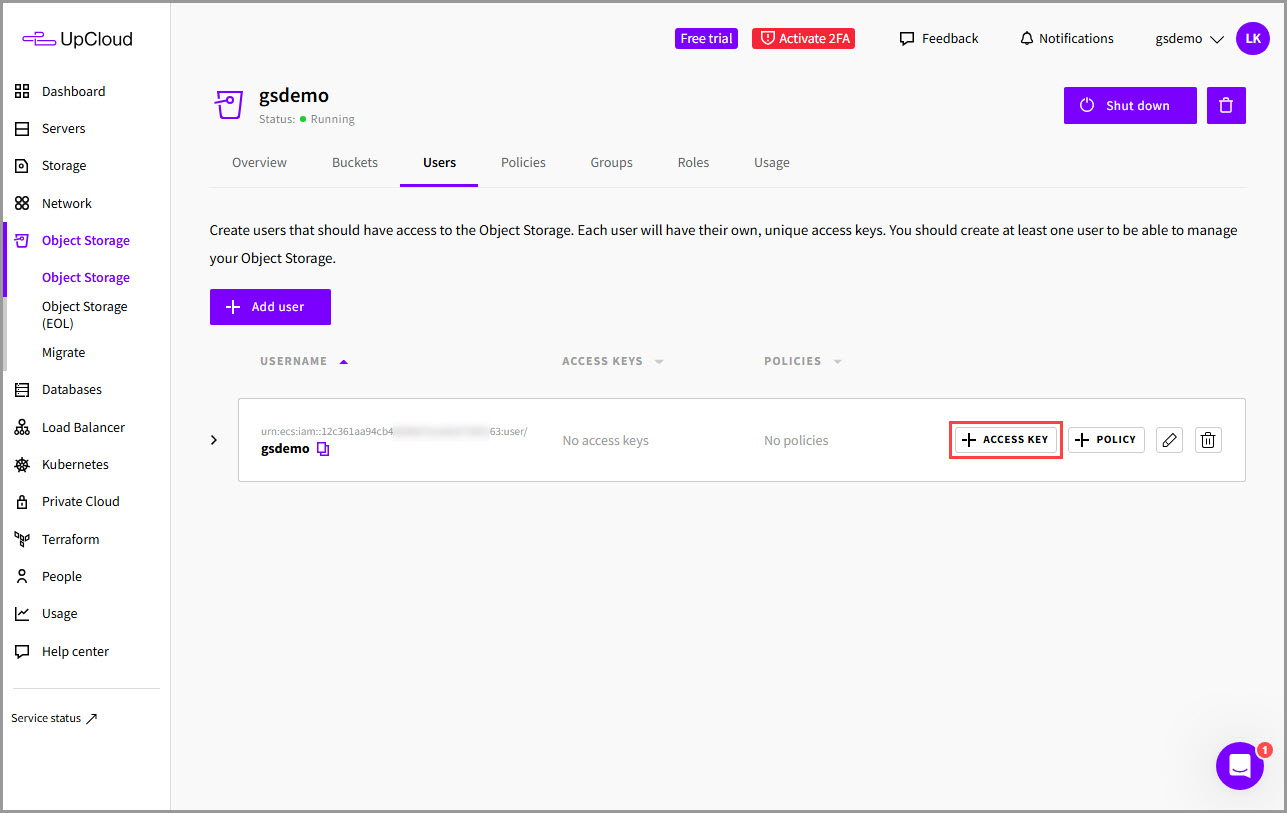
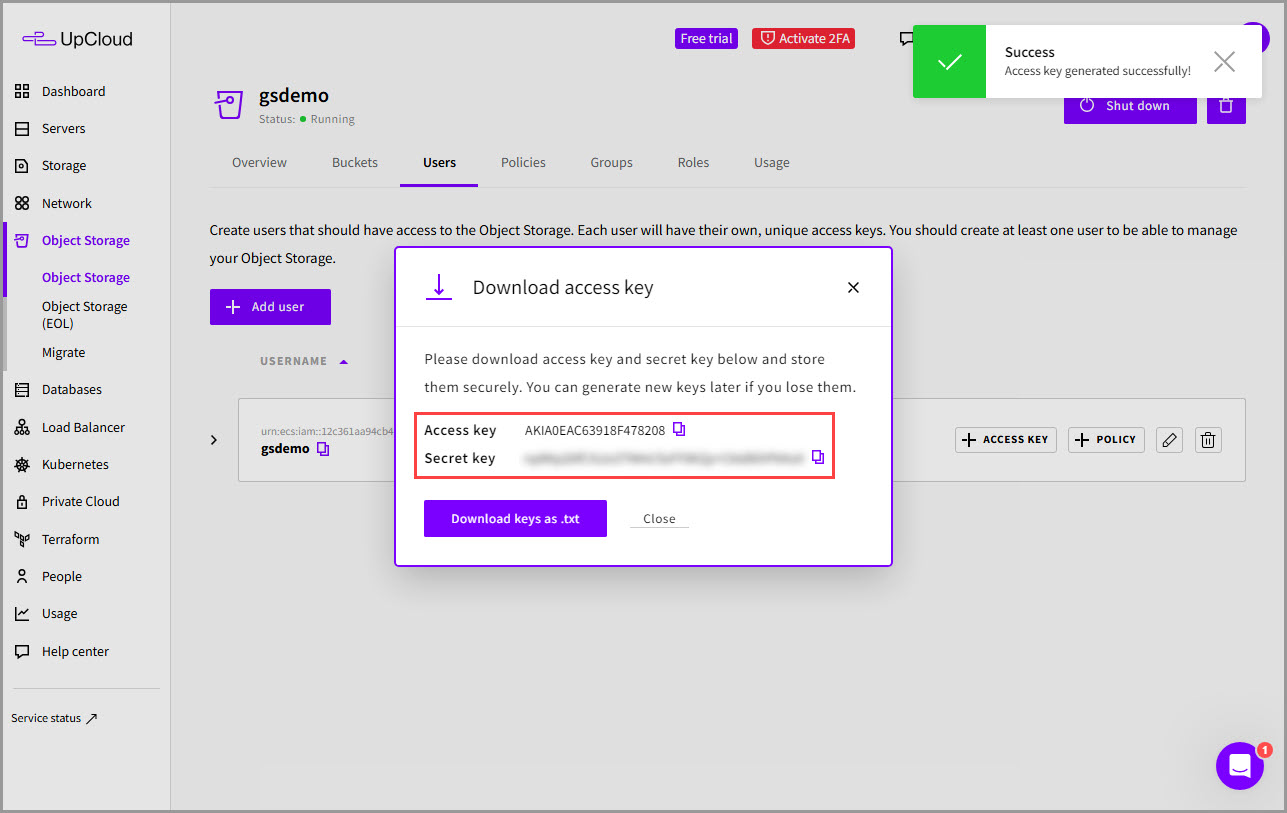
8) In the window that appears, you will see your new access key. The "Access key" and "Secret key" for use in GoodSync will be listed.
NOTE: We recommend storing the access key pair in a safe place like RoboForm SafeNote.