The following guide will detail how to install GoodSync on a WD NAS device.
Important Note: App installation works on the following WD NAS models: My Cloud, My Cloud Mirror, EX2, EX2 Ultra, EX2100, EX4, EX4100, DL2100, DL4100, PR2100, and PR4100. For all other models use SSH installation instructions.
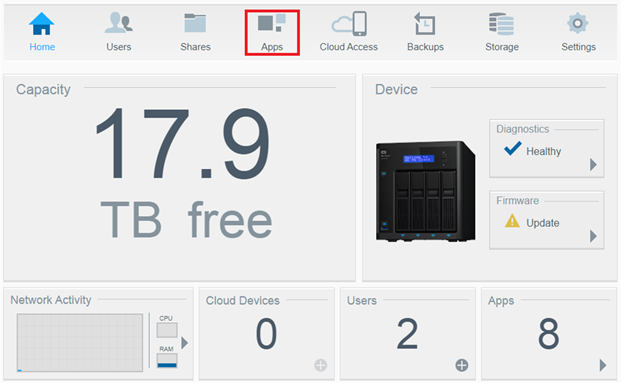
1) Login to your WD NAS and click on the "Apps" tab.
NOTE: If your model does not have an "Apps" tab, please review the SSH installation guide here.
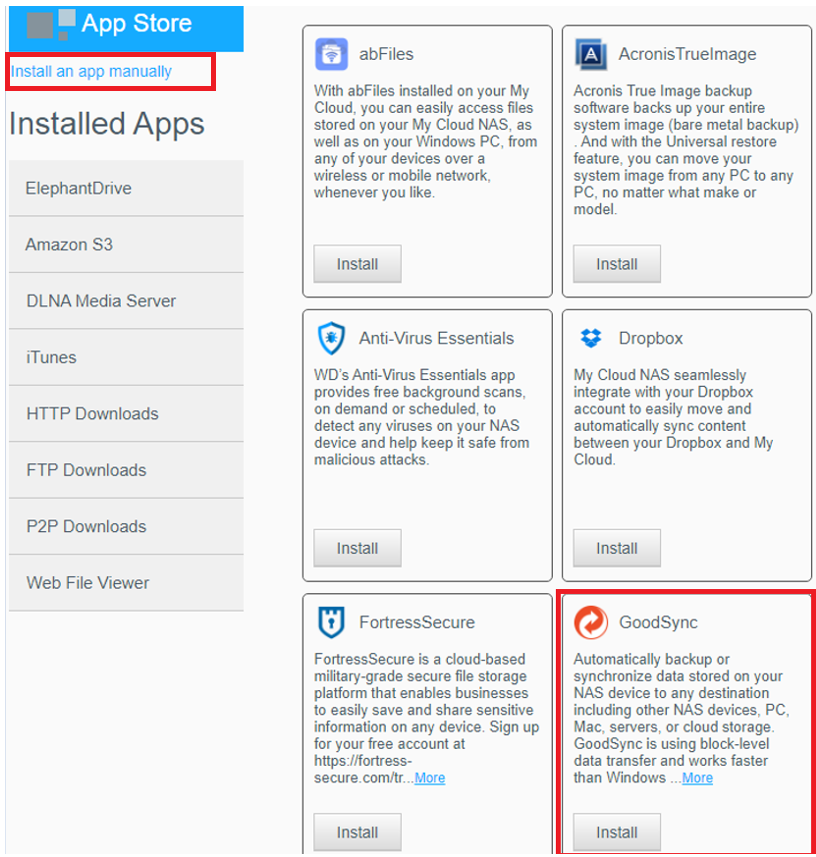
2) Click on the "Install" button below the GoodSync application in the application list.
Alternatively, you may also obtain the installer from our website here and select "Install an app manually" on the WD App Store page.
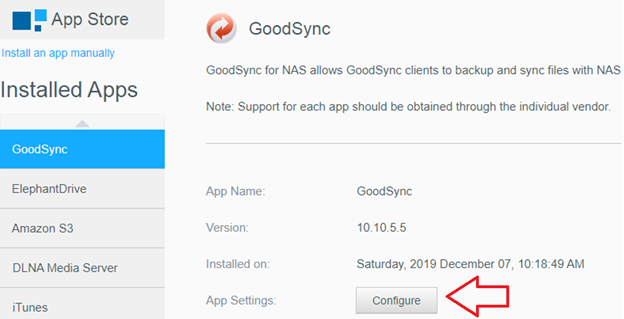
3) Once the app is installed, click on GoodSync on the left-hand column and click on "Configure".
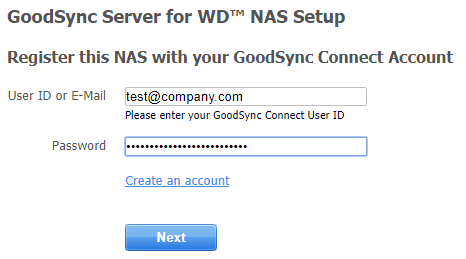
4) Enter your GoodSync Account (Account you created when installing GoodSync on your computer).
If you do not currently have a GoodSync Account, you may create one during GoodSync for WD installation on your Windows or Mac computer. Please use these download links.
Once the account has been registered, the NAS will be discoverable by other devices for backup and sync.

For WD NAS models that do not support App install, GoodSync can alternatively be installed directly through SSH.
1) SSH into your WD NAS.
2) Download the appropriate installer with the following command:
wget https://www.goodsync.com/download/goodsync-linux-armv5_marvell-release.run

3) Ensure that you grant the installer execution permissions:
chmod +x goodsync-linux-armv5_marvell-release.run

4) Run the downloaded installer:
./goodsync-linux-armv5_marvell-release.run

Recommended settings:
/usr/bin can be used in many cases for the installation directory, but the HDD directory /volumes is recommended instead.
Server resource directory can be the same as the installation directory.
Answer "y" to "Enable GsServer Web UI on port 11000."
Server log directory should also be on one of the HDD /volumes to avoid free space issues.
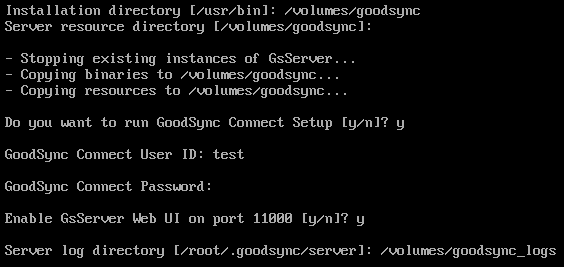
5) Enter your GoodSync account UserId and Password when requested.
If you do not currently have a GoodSync account, you may create a new account here.
Once the account has been registered to the NAS, the NAS will be discoverable by other devices for backup and sync.
6) You can change GsServer settings after installation by browsing to
http://your-NAS-IP-address:11000
Use your GoodSync account credentials to log in.
The installer may fail to update-rc.d if the NAS is running Busybox-based firmware.
In this case, use the following command to start GsServer manually:
/etc/init.d/goodsync-server start


